Remove Background From Image
Learn how to effortlessly remove background from images with these step-by-step tutorials and tools for a perfect result.
February 5, 2023
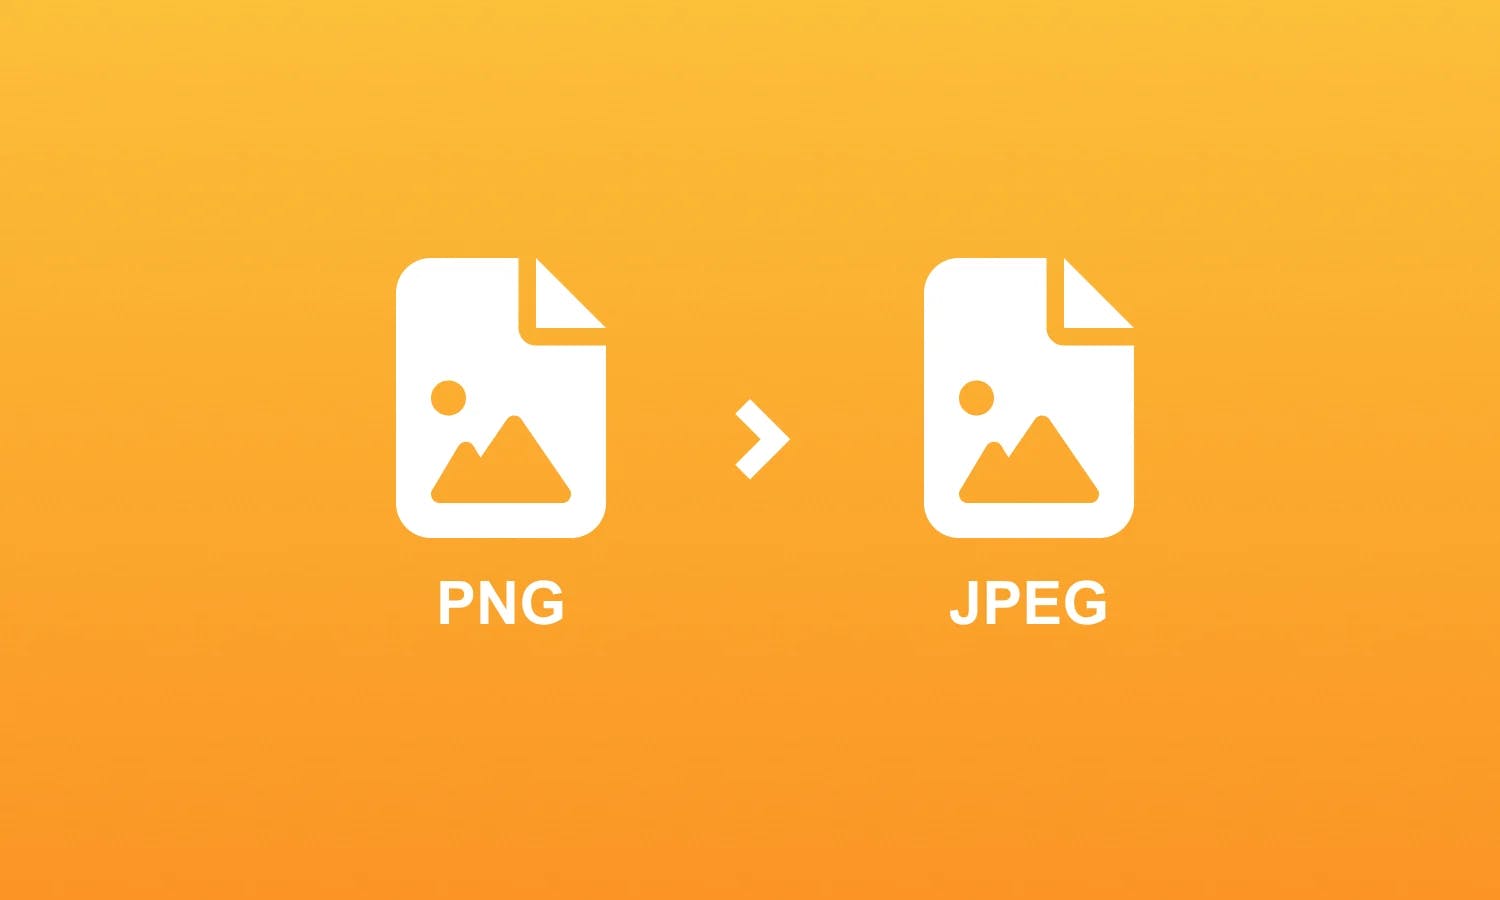
When it comes to resizing images, selecting the appropriate image format is crucial to achieve the best results. Different image formats have distinct characteristics and are suited for specific purposes. Here are some commonly used image formats and considerations for choosing the right format for resizing:
JPEG (JPG): JPEG is a popular format for photographs and complex images with continuous tones. It offers a good balance between image quality and file size. When resizing JPEG images, it's important to consider the compression level to strike the right balance between file size reduction and preserving image details.
PNG: PNG is a lossless image format that supports transparency. It is suitable for images with sharp edges, solid colors, or transparency requirements. When resizing PNG images, transparency is typically preserved, making it an ideal choice for graphics or images that require transparency effects.
GIF: GIF is primarily used for animations or simple graphics with limited colors. It supports animation and transparency, making it suitable for small file sizes and specific use cases. When resizing GIF images, it's important to preserve the animation frames and consider the limitations of the color palette.
SVG (Scalable Vector Graphics): SVG is a vector-based format that allows for infinite scalability without loss of quality. It is suitable for logos, icons, or graphics that require resizing to different dimensions. SVG images can be resized without pixelation or loss of detail, making them versatile for various applications.
TIFF (Tagged Image File Format): TIFF is a high-quality format often used for professional photography or archival purposes. It supports lossless compression and maintains image quality even after multiple resizing operations. TIFF files tend to be larger in size but offer excellent fidelity for printing or high-resolution applications.
When choosing the right image format for resizing, consider the specific characteristics of your images, such as complexity, color requirements, transparency, and scalability. Understanding the strengths and limitations of each format enables you to make informed decisions and achieve the desired results during image resizing.
When it comes to image resizing, you have the option to choose between lossless and lossy compression techniques. Understanding the differences and considering the specific requirements of your project can help you make an informed decision about which approach to adopt.
Lossless Compression: Lossless compression algorithms reduce the file size of an image without sacrificing any visual quality. When resizing images with lossless compression, the resulting image maintains the same level of detail as the original. This makes lossless compression ideal for situations where maintaining the highest quality and accuracy is crucial, such as archiving, professional photography, or graphic design projects. However, lossless compression typically results in larger file sizes compared to lossy compression.
Lossy Compression: Lossy compression algorithms, on the other hand, achieve higher levels of compression by selectively discarding certain image data. This results in a smaller file size but introduces a certain degree of quality loss. When resizing images using lossy compression, the image quality may degrade slightly due to the removal of non-essential or less noticeable details. Lossy compression is commonly used for web optimization, where smaller file sizes are desired for faster loading times. It is also suitable for situations where the minor loss of quality is acceptable, such as social media posts or online presentations.
When deciding between lossless and lossy compression for image resizing, consider the specific requirements of your project. If preserving the highest image quality is paramount, and file size is not a significant concern, opt for lossless compression. However, if reducing file size while maintaining an acceptable level of visual quality is important, lossy compression can be a suitable choice. Ultimately, the decision should align with your specific needs and the intended use of the resized images.
JPEG is a widely used image format known for its efficient compression algorithm. When it comes to resizing JPEG images, there are several pros and cons to consider. One advantage of resizing JPEG images is that the process is relatively fast, allowing for quick adjustments to the image dimensions. Additionally, JPEG resizing can significantly reduce the file size, making it suitable for web optimization and faster loading times.
However, it's essential to be aware of the potential drawbacks. One significant concern is the loss of image quality during resizing. JPEG compression is inherently lossy, meaning that some image details may be sacrificed to achieve smaller file sizes. When resizing JPEG images, this loss of quality can become more noticeable, leading to visible artifacts and a decrease in overall image sharpness. Therefore, it's crucial to strike a balance between file size reduction and maintaining an acceptable level of image quality.
Despite these limitations, JPEG resizing remains a popular choice due to its widespread compatibility and versatility. It is commonly used for photographs and complex images with a wide range of colors and gradients. By understanding the pros and cons of JPEG image resizing, you can make informed decisions regarding the appropriate usage and settings for your specific needs.
When resizing JPEG images, optimizing image quality is of paramount importance to ensure that the resulting images meet your desired standards. While JPEG compression inherently introduces some loss of quality, there are techniques and best practices you can employ to minimize these effects and achieve the best possible results.
One crucial factor to consider is the compression level used during JPEG resizing. Most image editing software and tools offer options to adjust the compression level when saving JPEG files. Higher compression levels result in smaller file sizes but at the cost of increased image degradation. Conversely, lower compression levels preserve more details but result in larger file sizes. Finding the right balance is crucial, and it often involves experimentation and visual inspection to determine the optimal compression level for a given image.
Another approach to optimize image quality during JPEG resizing is to utilize image editing software that offers advanced algorithms for resizing. These algorithms employ sophisticated techniques to minimize artifacts and preserve image details during the resizing process. Examples of such algorithms include Lanczos, Bicubic, and Spline interpolation methods. By using these algorithms, you can achieve smoother resampling and maintain higher image quality compared to default resizing methods.
Additionally, it's important to consider the resolution and aspect ratio when resizing JPEG images. Maintaining the original aspect ratio helps prevent distortion and ensures that the resized image appears visually pleasing. Resizing to specific pixel dimensions or using percentages can help maintain consistency across a series of images, especially when dealing with galleries or website layouts.
By being mindful of compression levels, utilizing advanced resizing algorithms, and paying attention to resolution and aspect ratio, you can optimize image quality during JPEG resizing. This way, you can strike a balance between file size reduction and preserving the essential details and visual fidelity of your images.
When resizing JPEG images, one common challenge is the appearance of artifacts, which are unwanted distortions or visual anomalies introduced during the compression process. However, there are techniques you can employ to minimize these artifacts and achieve better image quality when resizing JPEGs.
One approach to reducing artifacts is to use lower compression levels during JPEG resizing. Higher compression levels result in smaller file sizes but also lead to more significant loss of image quality. By choosing a lower compression level, you can retain more details and reduce the likelihood of noticeable artifacts in the resized image. It's important to strike a balance between file size and image quality to achieve the desired outcome.
Another technique is to use image editing software that employs advanced algorithms specifically designed for JPEG resizing. These algorithms utilize sophisticated methods, such as adaptive filtering and edge preservation, to reduce artifacts and preserve image details during the resizing process. By utilizing these specialized algorithms, you can achieve better results with fewer artifacts compared to using standard resizing methods.
Furthermore, it's advisable to avoid multiple resizing operations on the same JPEG image, as each resizing can introduce additional artifacts. If possible, start with the original high-quality JPEG and resize it directly to the desired dimensions. This minimizes the accumulation of artifacts and helps maintain the overall image quality.
By applying these techniques, such as choosing appropriate compression levels, using advanced resizing algorithms, and minimizing multiple resizing operations, you can minimize artifacts and achieve better image quality when resizing JPEG images.
PNG (Portable Network Graphics) is a popular image format known for its lossless compression and support for transparency. When it comes to resizing PNG images, it's crucial to understand how transparency is handled and how it can affect the resizing process.
PNG images can contain an alpha channel, which defines the level of transparency for each pixel. This alpha channel allows for the creation of images with complex shapes and irregular boundaries, such as logos or icons with transparent backgrounds. When resizing PNG images, it's important to ensure that the transparency is preserved correctly to maintain the intended visual appearance.
During the resizing process, the transparency information in PNG images is typically maintained. However, resizing can introduce challenges when dealing with semi-transparent pixels or complex alpha blending. In some cases, resizing can result in undesirable artifacts or jagged edges around the transparent areas of the image. To mitigate these issues, it's recommended to use image editing software that provides advanced resizing algorithms with built-in support for transparency preservation like Adobe Photoshop or Instasize
When resizing PNG images, it's also important to consider the original image's color depth. PNG supports different color depths, including 8-bit (256 colors), 24-bit (true color), and 32-bit (true color with alpha channel). Resizing images with lower color depths generally produces smaller file sizes but may result in visible color banding or loss of details. On the other hand, resizing images with higher color depths maintains better color accuracy and preserves fine details, but the resulting file sizes may be larger.
By understanding how transparency is handled in PNG images and considering the color depth, you can resize PNG images while preserving their transparency and achieving the desired visual results.
When resizing PNG images with an alpha channel, it's essential to handle the transparency information correctly to ensure the desired visual effect is maintained.
Resizing images with an alpha channel in PNG format involves two key considerations: preserving the transparency and maintaining the quality of the image.
Preserving the transparency during PNG image resizing requires using software or tools that support the alpha channel. This ensures that the transparent areas in the image are retained and correctly resized. When resizing, the transparent pixels should remain transparent, allowing the background or underlying elements to show through.
To maintain the quality of the image, it's important to use resizing algorithms that minimize artifacts and preserve the details of the non-transparent areas. Resampling methods such as Lanczos, Bicubic, or Spline interpolation are often recommended for resizing PNG images with an alpha channel. These algorithms take into account the neighboring pixels to produce smoother resampling and avoid introducing jagged edges or visual distortions.
It's worth noting that resizing PNG images with an alpha channel may result in larger file sizes, especially if the image contains semi-transparent regions or intricate details. To optimize the file size, consider reducing the color depth or utilizing compression techniques specifically designed for PNG files, such as the Deflate algorithm.
By correctly handling the alpha channel and utilizing appropriate resizing algorithms, you can ensure that the transparency in PNG images is preserved and the image quality is maintained during the resizing process.
GIF (Graphics Interchange Format) is widely used for animated images and simple graphics. When it comes to resizing GIF images, it's important to follow certain best practices to ensure optimal results while preserving the animation and minimizing any negative effects.
One crucial consideration when resizing GIF images is maintaining the original animation frames. GIF files consist of multiple frames, each containing a unique image that, when played in sequence, creates the animation. Resizing a GIF image should preserve these frames to ensure the animation remains intact. Therefore, it's recommended to use image editing software that supports resizing animated GIFs and retains all the frames during the process.
Another best practice for resizing GIF images is to avoid significant changes in dimensions. GIFs with intricate details, text, or fine lines can become blurry or lose legibility when resized to significantly larger or smaller dimensions. To maintain image quality and legibility, it's advisable to resize GIFs conservatively, keeping the dimensions within a reasonable range.
Additionally, it's important to consider the file size of the resized GIF. GIF images have a limited color palette (up to 256 colors), which makes them well-suited for graphics with solid colors or limited gradients. However, resizing a GIF can affect the image's color distribution and result in a larger file size. To optimize the file size, it's recommended to utilize dithering techniques and reduce the number of colors used in the resized GIF while still maintaining an acceptable visual quality.
Lastly, it's essential to test the resized GIF across different devices and platforms to ensure compatibility and smooth playback. Animated GIFs can behave differently on various browsers, applications, or operating systems. By testing the resized GIF and making necessary adjustments, you can ensure a consistent and enjoyable viewing experience for your audience.
When resizing GIF images, preserving the animation is of utmost importance to maintain the intended visual effect. Resizing animated GIFs requires careful consideration to ensure that the animation remains smooth and coherent even after the dimensions have been adjusted.
To preserve the animation during GIF image resizing, it's crucial to use specialized image editing software that supports resizing animated GIFs while retaining all the frames. This ensures that each frame of the animation is resized proportionally, maintaining the original timing and sequence. By preserving the frames, you can prevent any disruption to the animation and keep the visual experience consistent.
It's worth noting that resizing GIF images can affect the file size and playback performance. Larger dimensions or a higher number of frames can result in increased file size, potentially affecting the loading time and overall performance. To mitigate this, consider optimizing the GIF file by reducing the color palette, removing unnecessary frames, or applying efficient compression techniques. This helps strike a balance between maintaining the animation's quality and optimizing the file size for optimal user experience.
Another consideration when resizing animated GIFs is the aspect ratio. Changing the aspect ratio without adjusting the animation frames can lead to distorted or stretched visuals. To avoid this, it's recommended to maintain the original aspect ratio or apply appropriate resizing techniques that preserve the animation's proportions.
Lastly, it's important to test the resized animated GIF across different platforms, browsers, and devices to ensure compatibility and smooth playback. Certain platforms or applications may have limitations or handle animated GIFs differently. By conducting thorough testing, you can identify any potential issues and make necessary adjustments to ensure a seamless animation experience for your audience.
By employing these techniques and preserving the animation during GIF image resizing, you can maintain the intended visual impact and ensure a smooth and engaging animation playback.
Understanding image resizing formats such as JPEG, PNG, and GIF is essential for achieving the desired results when adjusting image dimensions. Each format has its own characteristics and considerations that influence the resizing process. JPEG is widely used for its efficient compression and is suitable for photographs and complex images. However, careful attention must be given to balancing compression levels to avoid significant loss of image quality. PNG, with its support for transparency, is ideal for graphics or images that require sharp edges or transparency effects. Resizing PNG images involves preserving transparency and utilizing appropriate resizing algorithms. GIF, primarily used for animations or simple graphics, necessitates preserving animation frames during resizing to maintain smooth and coherent playback.
Discover the latest expert tips and tricks on mastering social media strategies, honing your photing editing skills, and unleashing your creativity
Learn how to effortlessly remove background from images with these step-by-step tutorials and tools for a perfect result.
Learn how to crop photos on iPhone effortlessly. Discover simple steps and advanced tips to get the perfect shot. Try Instasize for seamless cropping and more.
Discover the best strategies to boost your YouTube Shorts views with practical tips and insights. Learn how to optimize your content for maximum engagement.

Learn how to crop a picture on Mac effortlessly with these simple steps. Enhance your photos using built-in tools or try Instasize for added features.

Stay on top of all the Instagram algorithm changes! Utilize the platforms latest features to get more instagram followers.

Learn how to create a folder on your iPhone in just a few simple steps. Organize your apps and make your home screen less cluttered with this easy guide.
Learn how to resize an image quickly and easily with these simple steps. Discover the best tools for image resizing, including Instasize for all your resizing needs.
The complete 2026 guide to Instagram image sizes. Exact pixel dimensions for feed posts, Reels, Stories, carousels, and profile photos — plus how to resize without losing quality.
Discover how to increase the DPI of an image with simple steps. Learn about different tools and methods to enhance your image quality. Instasize offers easy solutions for all your image resizing and optimization needs.
Discover the top methods to increase the resolution of an image. Learn practical tips and find out how tools like Instasize can help you easily achieve high-quality results.
Learn how to make an image smaller with simple steps. Optimize your images without losing quality using Instasize, available on iOS, Android, and Web.
Learn how to resize photos on iPhone without cropping. Discover quick and easy ways to resize your images without losing any part of the photo.
Put these tips into practice with our free tools, hand-picked to match what you just read